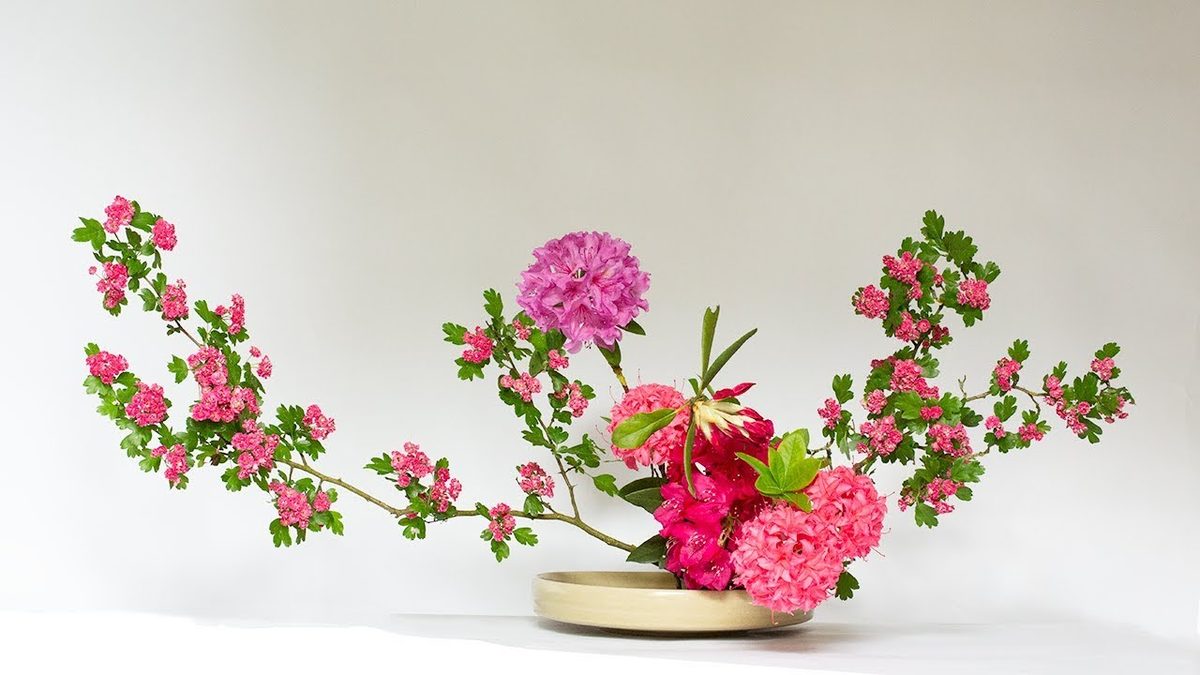
Ikebana is not just arranging flowers. It is a meditative practice rooted in Japanese philosophy. The word translates to “living flowers.” But it means more than keeping plants alive. It involves creating aesthetic compositions using nature’s elements. The goal is balance. It seeks to harmonize the material and spiritual worlds. You are not just decorating a room. You are connecting with the earth.
This art form encourages spiritual calmness. It invites you to slow down. The process itself becomes therapy. Colors and scents soothe the mind. But the structure requires precision.
Зміст
Understanding Ikebana Flower Arrangement Styles
The styles evolved over centuries. Early arrangements were strictly minimalist. Today, they can be highly decorative. Yet, the core principles remain.
Vertical Ikebana Style
This style uses seven branches. Each branch represents a natural element. Think mountains. Think waterfalls. Think valleys.
Historically, monks and aristocrats preferred this look. It highlights the plant’s natural form. It does not hide the stems. It showcases their lines.
Horizontal Ikebana Style
Horizontal arrangements focus on balance. They often depict a triad. This could be heaven, earth, and man. Or it could be father, mother, and child.
The layout emphasizes harmony. It spreads out rather than reaching up. It grounds the space.
Key Ikebana Schools
Different schools offer unique approaches. Each has specific rules about how stems are placed. They also carry distinct philosophical meanings.
Enshu School
The Enshu school is famous for the Moribana style. This method uses shallow containers. It often employs a kenzan—a spiked metal holder—to keep stems in place.
Three main stems are critical. They must be set at precise angles. The length of these stems matters. It represents the divine creation of nature.
You can use fresh or dried plants here. The choice reflects emotion. Happiness. Joy. Sorrow. All can be expressed through simple stems.
Why Try Ikebana at Home?
You do not need a garden. You do not need expensive equipment. A vase. Some wire cutters. A few stems from your yard or a local market.
Start with one branch. See its shape. Where does it want to go? Cut at a sharp angle. This helps water absorption. Place it in water immediately.
The tools are simple. But the focus is hard. You must look at the negative space. Empty space is as important as the plant. It gives the arrangement room to breathe.
Many people find this process grounding. It forces you to be present. You cannot rush nature. You have to work with its rhythm.
Consider the container. Does it complement the stems? Or fight them? The vessel is part of the art. It holds the composition together.
There is no “wrong” way if you follow the basics. But there is a right way to care for the materials. Keep them hydrated. Change the water daily. Trim the stems.
The result is a quiet corner in your home. A reminder of the seasons. A test of your patience.
“Ikebana is not about creating beauty. It is about revealing the beauty already there.”
This philosophy changes how you see plants. You stop seeing them as disposable decor

What is the Chiko Style in Flower Arranging?
Chiko Ekolü, or the Chiko School, takes a different approach to ikebana than the minimalist lines of other styles. This method embraces abundance and decoration. You are not just arranging stems. You are building a scene.
The core idea is simple. Include decorative elements alongside the flowers. It is less about negative space and more about the relationship between the plant material and the added objects.
Incorporating Non-Plant Materials
One of the defining features of this style is the inclusion of non-living materials. You can mix textures to create visual interest. Common additions include:
- Mirror fragments : Reflect light and add a shiny, modern contrast to organic petals.
- Sand or gravel : Provides a grounding base and introduces an earthy, rough texture.
These materials are not afterthoughts. They are structural components of the composition.
How to Start Your Chiko Arrangement
Getting started requires a bit more planning than a simple bouquet. You need to consider the weight and placement of each item.
- Choose your base : If you are using sand or gravel, select a shallow, wide container. This allows for easy spreading.
- Place your anchors : Secure your greenery first. In Chiko arrangements, foliage often supports the decorative elements.
- Add the mirrors or stones : Position these before adding the main flowers. This helps you see how they interact with the plant lines.
- Layer the blooms : Add your flowers around the decorations. Let them spill over or tuck behind the reflective surfaces.
Why Use Decorative Elements?
Using items like mirrors or sand changes the emotional tone of the piece. It moves away from pure nature and into curated design. It asks the viewer to look at the interplay of light and texture.
This style is ideal for homeowners who want to experiment with mixed media. It bridges the gap between floral art and home decor.
Tools and Materials Needed
You do not need expensive equipment. Standard ikebana tools work fine.
- Floral shears : For clean cuts on stems.
- Kenzan (flower frog) : If using a shallow vessel, a metal pin holder helps secure stems.
- Adhesive : Sometimes a bit of floral glue or wax is needed to keep heavy decorative elements in place, especially if they are not plant-based.
Safety Considerations
Working with mirrors and hard materials introduces minor risks.
- Glass shards : If breaking mirrors for fragments, wear gloves and use eye protection. Cut edges can be sharp.
- Stability : Ensure your container is heavy enough. Adding sand or mirrors increases the weight. Tip-over hazards are real if the base is light.
Where to Find Inspiration
Look at traditional Japanese garden designs. The use of stone and water mirrors in Zen gardens informs this aesthetic. You are essentially bringing that balanced chaos into a vase.
Mixing materials feels intuitive once you start layering. The result is less predictable. It is richer. More tactile.
The arrangement becomes a conversation between the fragile and the permanent. Between the growing and the still.
Experimenting with Textures
Try combining different densities. Soft petals against rough sand. Smooth glass against thorny stems.
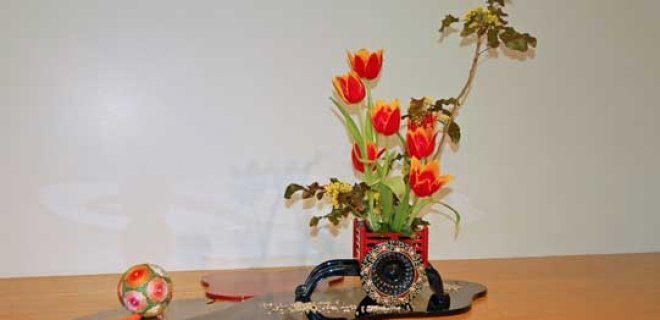

The Ikenobo School: Where History Meets Modern Design
Ikenobo stands out as the oldest surviving school of ikebana. It doesn’t just stack flowers. It blends centuries-old tradition with contemporary techniques. This is not a static art form. It evolves.
Students in this school don’t just learn to cut stems. They study Japanese history. They look at nature through a philosophical lens. The arrangement becomes a statement about time and place.
Why Ikenobo Matters for DIY Florists
Most people think of ikebana as rigid. Strict angles. Predictable shapes. Ikenobo breaks that mold. It allows for modern interpretation.
Here is how it differs from other styles:
- Historical depth : You are working with a lineage that dates back to the Muromachi period.
- Philosophical approach : The plant material is treated with respect for its natural growth pattern, not forced into submission.
- Modern flexibility : While rooted in tradition, it accommodates current design sensibilities.
If you are trying to figure out which ikebana style suits your home, consider this. Ikenobo is for the person who wants structure but needs room to breathe. It is less about perfection and more about balance.
How to Start Ikenobo at Home
You don’t need a dojo. You need a few basic tools and a willingness to look at a stem differently.
- Choose your container : A shallow bowl or a traditional tokonoma vase works best. Avoid anything too tall or narrow; ikebana is about space, not height.
- Select seasonal materials : This is non-negotiable. Use what is growing outside. Pines, bamboo, chrysanthemums, or even wild grasses.
- Prepare your tools : A sharp hansami or floral knife is ideal. If you don’t have one, a clean pair of pruners will do. Dull blades crush stems. Crushed stems die faster.
- The first cut : This is the shin (heaven) line. It should be the tallest element. Cut at an angle. This increases water absorption.
- Add the body : The soe (earth) and hikae (human) lines follow. They should be slightly shorter than shin. Create a triangle, but not a perfect one.
Safety and Maintenance
Working with plant material introduces some risks.
- Tool safety : Ikebana knives are sharp. Keep them clean. Store them properly. Do not leave them on a wet counter.
- Allergies : Some plants, like certain lilies or pollens, can trigger reactions. Wear gloves if you are sensitive. Wash your hands after handling sticky sap or heavy pollen.
- Water quality : Change the water every two days. Stagnant water breeds bacteria. Bacteria clog stems. Clogged stems mean dead flowers.
The goal is not to create a bouquet. It is to highlight the natural beauty of the plant. Ikebana is a practice. It takes patience. You will make mistakes. The stems will droop. The angles will feel off.
That is part of the process.
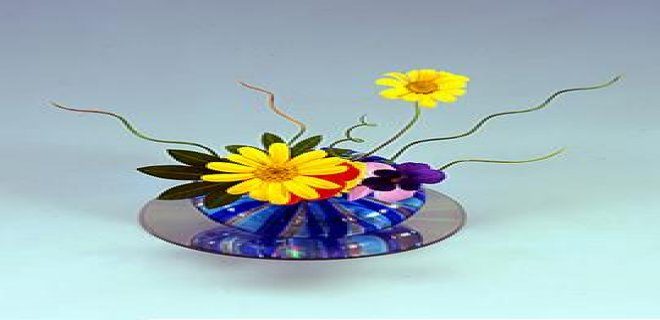
The Aratame Approach: Breaking the Rules
Most ikebana schools start by enforcing strict geometry. You learn the angles. You memorize the spacing. You keep the branches perfectly symmetrical. The Aratame school throws that rulebook out.
It is a modern offshoot. It prioritizes experimentation over tradition. If you are used to the rigid lines of Ikenobo or Sogetsu, this style might feel chaotic at first.
Creative Freedom After the Basics
The structure of Aratame training is deceptive. Students do learn foundational techniques. You cannot break rules effectively if you do not know them. But the goal is different.
Once the basics are locked in, the teacher steps back.
You are free.
“Students create their own arrangements with creative liberty after mastering fundamentals.”
This is not a free-for-all. It is a guided release. You are expected to bring your own vision to the vessel.
Why Choose Aratame for DIY?
For the homeowner who hates perfectionism, this style is forgiving.
- No strict measurements: Branches can extend in any direction.
- Natural forms: Twisted wood and wild foliage are welcome.
- Personal expression: There is no single “correct” way to place the focal flower.
You do not need a straight ruler. You need a sharp pair of shears and the confidence to make a choice that might look “wrong” to a traditionalist. And that is the point.
What You Will Need
Since Aratame rejects the standard three-branch structure (Shin, Soe, Uke), your toolkit changes slightly.
- Heavy vessels: Because arrangements are often asymmetrical, a wide, weighted base prevents tipping.
- Kenzan (floral frogs): Essential for holding unconventional angles.
- Pruning saw: For thicker, more organic branches that traditional scissors cannot handle.
- Wire and tape: To secure erratic shapes that gravity might otherwise undo.
How to Start Your First Arrangement
Skip the textbook steps. Start with a single statement piece.
- Choose a branch with a natural curve.
- Cut the stem at a sharp angle.
- Place it in the vase. Let it lean.
- Add one or two supporting stems that follow the same energy.
- Step back.
If it feels balanced to you, it is balanced. If it feels like it is about to fall over, lean it further that way. That tension is the aesthetic.
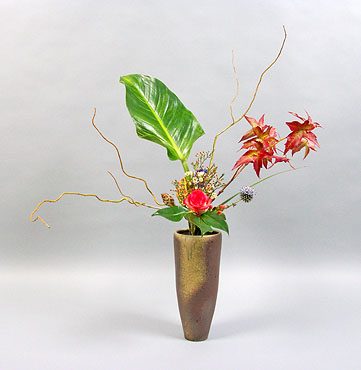

The Ohara School: Letting Nature Lead
The Ohara school of Ikebana doesn’t just arrange flowers. It frames the plant’s inherent character. You aren’t forcing a shape onto the stem. You are revealing what the stem already wants to be. This style emphasizes the natural beauty of the seasons. A bare winter branch tells a different story than a lush summer fern.
When you work in this style, the container matters as much as the plant. The vessel isn’t just a holder. It’s part of the composition. Your goal is harmony between the floral material and the pot. If the vase is heavy and ceramic, a delicate wildflower might get lost. Conversely, a slender, tall vase needs a plant with vertical strength.
Matching Vessels to Plants
Start by assessing the texture of your container. Is it rough? Smooth? Glazed? Matte? Now look at your plant material. Do the textures complement or clash?
- Earthy pots: Pair with dried grasses, twigs, or autumn leaves. The roughness of the clay mirrors the dryness of the plant.
- Glass vessels: Use clear water plants or stems with translucent leaves. The light passing through creates depth.
- Metallic containers: Strong, architectural lines work best. Think of bamboo or stiff orchids that can stand their ground against the shine.
Tools You Will Need
You don’t need an expensive set to practice Ohara. Basic tools will do.
- Sharp scissors or pruners: Dull blades crush stems. Crushed stems die faster. Keep the cuts clean.
- A stable base: Sometimes stems slide. A small amount of floral foam or a grid of tape inside the neck can help anchor them while you arrange.
- A damp cloth: Mist leaves occasionally to keep them perky during the arrangement process.
Step-by-Step Assembly
- Select your primary branch. Look for the one with the best natural curve. Place it in the vase first. This sets the height and direction.
- Add secondary elements. These should be simpler. Fill in the space around the main branch without hiding its line.
- Check the base. Ensure the stems are tightly packed at the bottom. Loose stems tip over easily.
- Step back. Look at the arrangement from eye level. Does the pot feel like an afterthought? If so, move a stem lower to connect with the rim.
Why This Approach Matters
Most people throw stems into water and walk away. They don’t think about the relationship between soil and pot. Or leaf and light. The Ohara school forces you to slow down. You have to observe the plant. You have to respect its limits.
Is it easier to buy a pre-made bouquet? Sure. But there’s a satisfaction in building something that reflects the actual mood of the room. A heavy, dark vase in a sun-drenched kitchen feels wrong. A light, airy glass on a dark oak table might feel ungrounded. Finding that balance is the work.
It’s not about perfection. It’s about coherence. When you get it right, the arrangement feels like it grew there. Not like it was dropped in. The season is in the room.
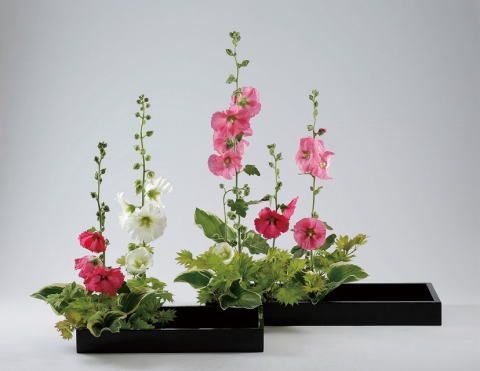

Sogetsu Ikebana: Breaking the Rules with Modern Design
Forget everything you think you know about traditional flower arranging. The Sogetsu School is where ikebana goes to break free. It doesn’t care about rigid symmetry or ancient protocols. Instead, it demands personal expression.
This style treats flowers as raw material for modern art.
Unconventional Materials and Tools
You won’t just be buying roses from the grocery store. Sogetsu practitioners dig deeper. They use natural materials in ways that might seem weird at first. Think driftwood. Broken branches. Dried grasses that look like tangled wire.
The goal is to create unexpected shapes.
“Sogetsu focuses on personal expression and modern approaches, using natural and handmade materials in unexpected ways.”
Students don’t just arrange stems. They design their own containers. This isn’t about finding the perfect vase from a catalogue. It’s about making something from scratch. Clay. Metal. Recycled plastic. If you can hold it, you can probably turn it into a vessel.
The DIY Process: How to Approach Sogetsu
Start with a blank slate. Look at your materials not as flowers and sticks, but as lines and textures.
- Choose your base material. It doesn’t have to be a pot. A stone slab works. A piece of bark works too.
- Design your container. If you’re using clay, let it air dry before firing. If you’re repurposing glass, sand the edges. Safety first. Sharp edges ruin the vibe and your hands.
- Select your plant material. Go for asymmetry. Find a branch that twists oddly. Pick a flower that’s half-bloomed.
- Arrange without rules. There is no “wrong” way to place a stem in Sogetsu. Just ensure it interacts with the empty space.
Why Choose This Style?
Traditional ikebana can feel restrictive. Sogetsu offers an outlet. It’s for the homeowner who wants their interior decor to reflect current trends rather than historical ones. It fits well in minimalist apartments or modern lofts.
The focus shifts from the flower’s species to the composition’s energy.
Tools You’ll Need
Basic ikebana tools aren’t enough here. You’ll need more heavy-duty items.
- A sturdy knife for cutting thick branches.
- Wire cutters for manipulating stems.
- Adhesives if you’re attaching dried elements to your handmade vase.
- A kiln or access to one if you’re firing your own ceramics.
It’s hands-on work. Messy work.
The Result
A composition that looks like it walked out of a gallery. It’s bold. It’s asymmetrical. It ignores the golden ratio.
Some people hate it. They call it chaotic. They say it lacks respect for the plant.
Others call it freedom.
You’ll likely fall into one camp or the other. The style doesn’t care. It just wants you to make something that speaks to you right now. Not what your grandfather thought was beautiful.
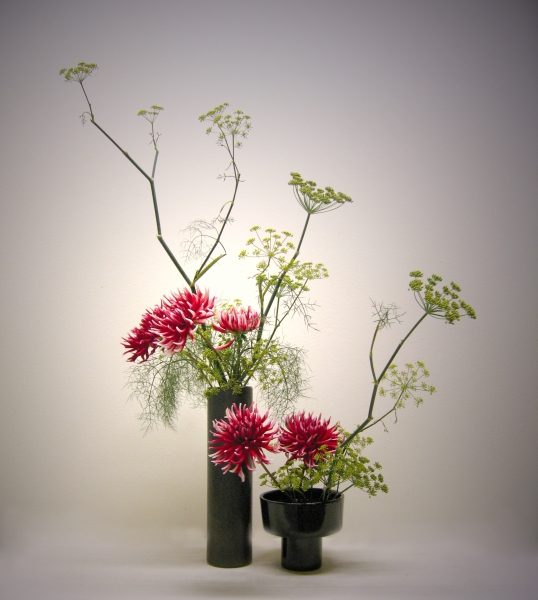

Why Ikebana Still Matters in Today’s Decor
Ikebana isn’t just flower arranging. It’s a discipline. A way of seeing space. The philosophy behind it has kept the art relevant, drawing attention from minimalist designers to chaotic urbanites. Different schools—Ikenobo, Sogetsu, Ohara —offer contrasting rules. Some demand strict geometry. Others embrace wild asymmetry. This flexibility is why it works for traditionalists and modernists alike. You don’t need to be a professional florist to start. You just need patience. And a willingness to look at a dead branch and see potential.
Core Principles: Space, Line, and Form
Forget the bouquet. Forget full, round arrangements that fill every inch of a vase. Ikebana is about what you leave out. Negative space is as important as the plant material. Think of it as architectural. You are building structure in air.
The basic components are simple, though hard to master:
- Shin : The main branch. It represents heaven or the primary energy. It should be the tallest element.
- Soe : The secondary branch. It supports Shin. It balances the composition, often curving in the opposite direction.
- Hikae : The tertiary branch. It grounds the piece. It’s the shortest, anchoring the design to the vase or container.
This structure isn’t arbitrary. It mirrors the Japanese belief in harmony between heaven, earth, and humanity. When you place these three elements, you’re not just arranging flowers. You’re creating a triad of energy.
Essential Tools and Materials
You don’t need expensive equipment. A basic kit will get you started.
- Kenzan : A metal flower frog. It holds stems in place. Cheap ones wobble. Buy a heavy one with sharp tines.
- Sakai Bune : A small, sharp knife for precise cuts. Florist shears are too blunt. They crush stems. A clean cut heals faster.
- Branch Clippers : For thicker wood. Don’t try to cut a 1-inch branch with scissors. It’ll slip. You’ll get hurt.
- Containers : Ceramic pots. Glass vases. Bamboo baskets. The container is part of the art. It should complement the plants, not compete with them.
Step-by-Step: Creating a Basic Nageire Arrangement
Nageire means “thrown in.” It’s loose. It’s natural. It’s perfect for beginners who are intimidated by rigid structures.
- Prepare Your Vessel : Clean it. Remove any algae or debris. Water quality matters. Stale water kills stems faster.
- Select Your Foliage : Start with greenery. A branch with interesting bark texture. Maybe a pine sprig. Or a simple maple leaf.
- Insert Shin : Place your main branch first. Angle it slightly forward. Use your kenzan to lock it. Check the height. It should be about 1.5 times the width of your container.
- Add Soe : Insert the secondary branch. It should curve outward. Keep it lower than Shin. The distance between the tips of Shin and Soe should feel balanced, not symmetrical.


