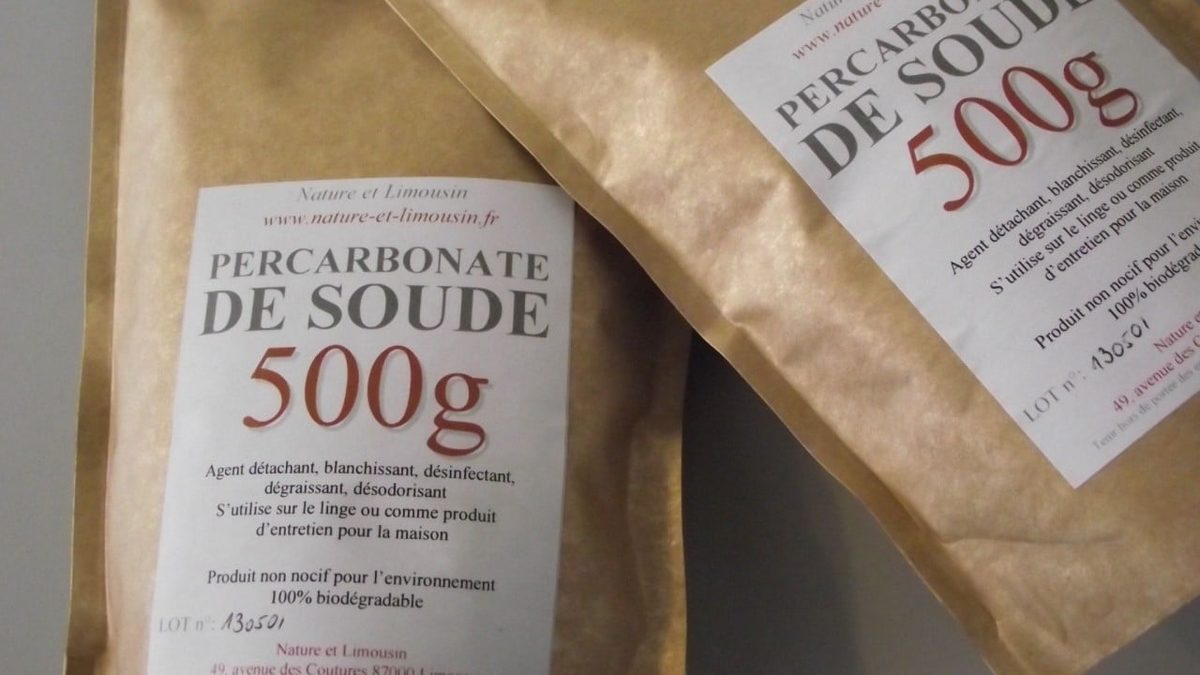
Blackened grout lines in the bathroom or kitchen are small details that spoil an otherwise clean room. You rub. Try white vinegar. You rub again. The result is usually disappointing. Dirt sticks. The mold will return within two weeks. The actual solution is sodium percarbonate. It is an almost odorless white powder. In a health food store or hardware store, 200 grams costs less than two euros. It works while you do something else.
Зміст
Why vinegar does not work on deep stains
White vinegar is an acid. It goes well with lime. It struggles with deep mold and grease embedded in cement mortar. Baking soda is a bit abrasive. It is mixed with vinegar to dissolve calcium and disinfect. This physicochemical reaction remains superficial. It’s bubbling. It looks impressive. It dries without penetrating properly.
Sodium percarbonate works differently. Its components are soda crystals and hydrogen peroxide. This combination provides degreasing, deep cleaning, deodorization and whitening. The main difference is the way it works. Oxidation removes grease and mold while preserving surface sealants. Vinegar dissolves only on the surface. The active oxygen of the percarbonate rises from the pores of the mortar.
Chlorine products, such as bleach, attack the cement’s chemical bonds. This increases the porosity of the mortar. The structure becomes brittle and fragile. Bleach damages what it is supposed to clean. Sodium percarbonate is an excellent, environmentally friendly alternative to bleach.
Chemistry simplified
Also called sodium percarbonate, this active ingredient combines sodium carbonate and hydrogen peroxide. These are soda crystals stabilized with hydrogen peroxide. They form small white pearls. Dry powder is inert. Heat triggers a reaction.
Active oxygen is released when it comes into contact with hot water (at least 40 °C). This oxygen brightens, removes grease and disinfects heavily soiled or moldy joints. This effervescence isn’t just for show. The liberated oxygen chemically attacks the molecular bonds of organic compounds and causing stains. These compounds include fungi, grease and soap scum.
The product does not contain chlorine or phosphates. It breaks down quickly without leaving harmful residues for the environment. When its effect is complete, it decomposes into water, sodium carbonate and oxygen. Nothing toxic goes down the drain.
Remember this often overlooked detail: when the product is mixed with water, it releases active oxygen and remains effective for only 4-6 hours. Do not prepare a large amount in advance. Mix each use just before use.
A step-by-step protocol for perfect grout
You don’t need advanced equipment. A spray bottle, very hot tap water and a tablespoon of powder are enough. In a spray bottle, dilute one tablespoon of percarbonate with four tablespoons of hot water. Use this solution within four hours of mixing.
Spray on grout lines. Leave on for at least thirty minutes. This longer exposure time makes a difference compared to wiping with a damp cloth.
Make a paste for particularly dirty joints. Mix the sodium percarbonate with just enough water to make a thick consistency. Apply directly to dirty joints between tiles. This concentrated version increases the oxidizing effect in places where dirt is most stubborn.
Add a spoonful of black soap to the solution to improve the degreasing effect. Black soap acts as a natural surfactant. It helps to lift grease.
Rinse thoroughly after resting. To avoid a white film on the grout, dry the grout lines. Sodium carbonate residue can dull the surface of the tile.
Safety: Although the product is natural, care must be taken when handling oxidizing agents. Wear rubber gloves to prevent skin from drying out. Safety glasses prevent accidental splashes.
Let’s talk about money, because green cleaning shouldn’t break the bank. One kilogram of sodium percarbonate usually costs 4-7 euros. That sounds like a lot, until you realize that a 1-kilo bag will last you months for normal home use. If you’re just starting out, you’ll want to stick to smaller bags that you can find at hardware stores or online. These 200-500 gram packages often cost less than 2 euros. Mathematically, that’s about ten separate cleaning sessions. You get a lot of mileage for a little money.
You can find these things everywhere now. Large supermarkets, specialized organic stores such as Biocoop or La Vie Claire, and even general online stores sell it in their household departments. It’s not obscure anymore. It’s mainstream.
Proper storage is important
This is where people mess up. You buy the powder, throw it in the original bag and leave it in the bathroom cabinet. Bad idea. Moisture is the enemy. As soon as sodium percarbonate comes into contact with moist air, it begins to oxidize. It breaks down before you use it. You are literally throwing money away.
Store in an airtight container. A glass jar with a screw top works perfectly. Store it under the sink in a cool, dry place. If the seal breaks, the powder loses its effect. Don’t let it happen.
Drying is the real secret
Cleaning with percarbonate is only half the battle. The other half? Keep water away. After scrubbing and rinsing, grab a squeegee. Use it after every shower. This simple process removes standing water. Thanks to it, the silicone joints dry in a few minutes.
Why is this important? Fungi need moisture to thrive. By drying the joints quickly, you cut off their food supply. You stop recolonization before it starts. With this routine, you don’t have to strip the tiles or replace the silicone every year. A sodium percarbonate treatment every two or three months is enough to keep the joints white and mold-free. Long-term. Without the hassle.
Proper storage prevents premature decay, while drying after cleaning prevents the formation of mold at its source.