Solar energy is no longer just a futuristic concept. This is the reality of home energy production. The initial costs are high. But as operating costs increase, long-term savings increase. You get back more than you paid for. The math will work in your favor in the end.
If you are buying panels for the first time and are considering getting a quote from a contractor, stop for a moment. Do you have a tool belt? Are you comfortable with a drill and a hammer? Then you probably don’t need the pro version. This is a hands-on project. But it is not a casual one.
Check with your local zoning board before purchasing individual bolts. Some cities don’t like the look of the panels. Others require a special permit. Deal with the legal issues first. Skipping this step can cost more than the installation.
Here we show you how to install solar panels yourself. 7 steps. There are no shortcuts.
Зміст
Choose a suitable roof location
Start with orientation. Requires the west or east side of the roof. Choose the side that gets the most direct sunlight throughout the day. If you are in the northern hemisphere, the south side is ideal, but if your roof is sloped or shaded, the east and west sides are best for an consistent exposure.
Calculating Latitude Tilt
Your angle matters. A flat panel is a lazy panel. For maximum efficiency, it should be tilted towards the sun.
If you live below 25 degrees latitude, the slope must correspond exactly to your latitude.
* 25 degrees of latitude = 25 degrees of tilt.
In places between 25 and 40 degrees latitude, add five degrees for every five degrees above 25 degrees.
* 30 degrees of latitude = 40 degrees of inclination.
* 35 degrees of latitude = 50 degrees of inclination.
If you live north of 40 degrees north latitude, the formula changes. Add twenty degrees to your latitude number.
*Latitude 55 degrees = slope 75 degrees.
Remember this. Write it down. Say it 5 times. Get it right.
Finding and Marking Rafters
The stand must be attached to the structural timber. Never screw into plasterboard or cladding alone. You need the rafters.
Use a stud finder. Or dig out the drawings of the house. The space is installed at a distance of 4 meters from each other. This distributes weight and wind loads evenly. Accuracy here prevents future structural damage.
Drilling into the Rafters
Drill the hole carefully. Drilling holes in expensive structural wood. If you split the rafter, it affects the entire installation. Use a drill bit that fits the size of the steel bolt. Go slow. Let the tool do the work. Don’t force it.
This hole serves as the base. Attach the steel bolts that secure the bracket to the ceiling.
Securing the Mounts
Place the steel bolt in place. Tighten them down. But don’t stop there. You need to caulk around each bolt.
This is not negotiable. You need to keep your thermal envelope airtight. Water penetration is your enemy. Use a high-quality roofing sealant. Water dripping into the attic can lead to mold, rot and poor insulation. Be sure to close it tightly.
Mounting panel
Attach the panel to the rack. Most systems have pre-built interfaces. They are designed for easy fastening. Follow the manufacturer’s instructions.
Leave a gap. Panels should be at least a quarter of a foot from the surface of the roof. Why? Airflow.
The panel is hot. Heat reduces efficiency. Air movement under the panels keeps them cool. Cooling is required for best efficiency. Don’t crowd them against the shingles.
Electrical connection
The panel is installed. The bolt is sealed. Air moves. What now?
Connect it to your electrical supply.
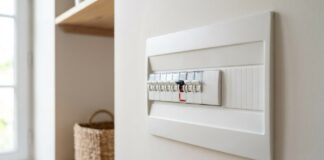
If you are not a licensed electrician, do not attempt this yourself. I’m good at nailing wood to wood. I am not qualified to connect live electrical systems. Leave the wiring to a professional. It’s not worth the risk of fire or electrocution.
The hardware is simple. Electricity is dangerous. Leave the final step to the experts.
Why this matters
DIY solar isn’t all about labor costs. this is