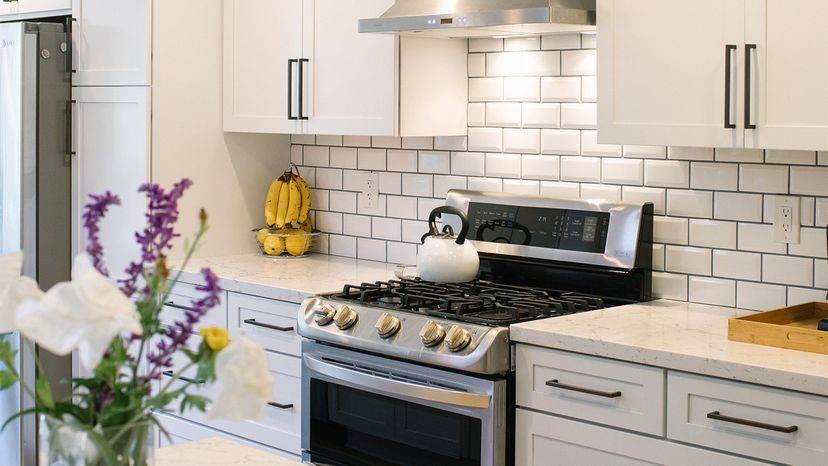
Shiplap might be fading from favor. Barn doors look great until the track fails. But subway tile? It just keeps showing up. Whether you’re scraping old wallpaper or planning a full gut renovation, this humble rectangle seems to anchor every style, from gritty industrial lofts to pristine farmhouse kitchens.
But here is the thing most people don’t know. That classic white strip you’re installing behind your stove didn’t start in a designer’s showroom. It started in the dark, damp tunnels of New York City.
Зміст
Born in the Underground
The term “subway tile” isn’t marketing fluff. It’s literal. These tiles were engineered specifically for the New York City subway system when it opened in 1904.
Two architects, George C. Heins and Christopher Grant La Farge, were tasked with solving a problem. The underground stations were grim. They needed a surface that was durable, easy to scrub clean, and visually distinct from the mundane above-ground structures.
They chose a 3-by-6-inch (7-by-15-centimeter) glazed ceramic tile. They laid it in a classic brick-like running bond pattern. It worked. It reflected the electric light of the new electric trains. It resisted grime. It was practical to the core.
“After their use in NYC subways, they transitioned to residential design in the ’20s and have continued their steady popularity,” says Ryan Fasan, technical consultant for Tile of Spain USA.
The transition wasn’t instant. It took a decade or two. But once homeowners realized they could get that clean, institutional look in their own bathrooms and kitchens, the tile never looked back.
The Definition Has Shifted
If you go to a big-box store today, you won’t just see the 3-by-6. The definition of subway tile has stretched.
Classically, the ratio was strictly 2:1. Width was half the height. But the market demanded more variety.
Now, the term “subway tile” covers a broad category of small-format rectangular ceramics. You’ll find:
- 4-by-8-inch variants
- 4-by-16-inch long strips
- Micro-rectangles that are barely wider than a finger
“Really, the term has grown to encompass all small-format rectangular tile,” Fasan notes. “Any small format rectangle with a standard 1:2 or 1:4 ratio is often referred to as subway tile. Generally, the small format and rectangular shape are the biggest identifiers.”
This expansion matters if you’re doing the labor yourself. A 4-by-16 tile changes how you cut corners. It alters the sight lines of your backsplash. It requires different mortar bed considerations than the classic 3-by-6.
Why It Endures
The longevity of subway tile comes down to two factors: versatility and ease.
Glazed ceramic is non-porous. It wipes down. It doesn’t stain. For a kitchen where grease and sauce fly, that’s not a luxury. It’s a necessity.
And the palette? It’s infinite. You can buy it in matte black, glossy white, textured zellige, or metallic finishes. It doesn’t dictate a style. It supports it.

Know When to Skip the Look
You can slap subway tile anywhere you want, but just because you can doesn’t mean you should. Take a rustic country kitchen with rocking chairs and quilts. It clashes. The aesthetic is wrong. Subway tile carries a heavy retro or steampunk connotation. It leans into Art Nouveau and modernist design languages. If your home features Edison bulbs, SMEG appliances, or mid-century modern furniture, the tile fits right in. If you’re going for cozy farmhouse charm? Skip it. It will look out of place.
Keep It Indoors
Mass-market subway tile isn’t built for the elements. The originals in the subway systems were fired from high-density porcelain clay to survive abuse and humidity shifts. Modern residential versions? Often just ceramic wall bodies. Keep them inside. Walls only.
Outdoor spaces are growing in popularity, so manufacturers now make specific outdoor variants. Check the specs before you buy. And never, ever put standard subway tile on the floor. The glazes are too delicate. You need technical data like PEI ratings for abrasion resistance and DCOF for slip resistance. Without those numbers, you’re asking for cracked tiles and slippery floors.
Installation Isn’t Always Simple
The premise is that DIY installation is easy. You need grout, adhesive, tile, water, and a cutter. You have flexibility in how you lay it—horizontal, vertical, or stacked. It seems straightforward until you try a complex pattern like herringbone.
Here is where most people fail. They don’t check if the dimensions are modular. Modular means the small tiles are exact divisions of the larger ones. Many subway tiles aren’t modular. If you try to lay them in a 45-degree herringbone pattern, the lines drift. The angles lean. It gets messy fast. Unequal sizing ruins the optical alignment. Plan carefully before you cut the first piece.
High-Contrast Grout Requires Caution
A current trend is making the tile pop by using starkly contrasting grout. White tile with black grout is a popular combo. But deep pigments can penetrate the tile surface. Test the grout on a sample tile first. You don’t want permanent staining. A little prep saves a lot of headaches later.