Walk down any aisle in a big-box hardware store and you will drown in options. Specialty gadgets promise to solve problems you didn’t even know you had. They sit on the shelves, expensive and bulky. You might use that $200 tile saw exactly once. Or maybe never.
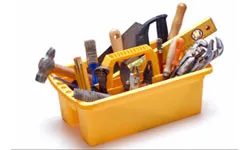
Builders know this reality better than anyone. They don’t rely on the flashy toys. They rely on the workhorses. The tools that fit in a standard toolbox. The ones that don’t need a manual or a software update.
You don’t need a degree in engineering to build a shelf or frame a wall. You just need the right basics. Here are the five tools that actually matter. Start with the one that starts every project.
Зміст
5. Hammer and Nails
It sounds cliché. It’s probably the first item you bought. But you’d be surprised how many people ignore the basics.
A hammer isn’t just a heavy metal head on a stick. It’s an extension of your hand. Pick up a claw hammer. Feel the weight distribution. The head should be balanced. Not too heavy to swing, not too light to drive a 16-penny nail into oak.
Most DIYers buy the first hammer they see. That’s a mistake. Look for a fiberglass handle. It absorbs shock better than hickory. If your wrists ache after an hour of framing, you bought the wrong tool.
Nails are another story. You can’t just grab any nail. Galvanized nails resist rust. Use them for exterior decks. Interior drywall needs sharp, hardened nails that bite deep.
“The right hammer makes a 10-minute job take five. The wrong one makes it take all day.”
Keep a few sizes on hand. 16-penny for framing. 8-penny for trim. 4-penny for delicate finish work. Don’t buy a mixed bag from the dollar bin. Sort them yourself.
Safety matters here. Wear eye protection. Nails slip. Wood splinters fly. A cheap pair of safety glasses is cheaper than a trip to the ER.
Start simple. Master the swing. You’ll need it for everything that follows.
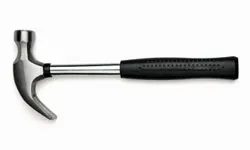
You could argue that power tools make life easier. They do. But there is a specific frustration that no battery-powered device can solve instantly. You are trying to pull a nail. The gun loaded it. Now you have to take it out. A nail gun is a one-way street. It drives fast. It does not reverse.
For the average homeowner, the claw hammer remains the king of simplicity. It handles two jobs at once. Drive. Extract. No cords. No batteries to die mid-project. Just weight and leverage.
Why the Claw Hammer Is Still Essential
Most people think of a hammer as just a thing that hits things. That is only half the story. The design is actually a lever. The claw end is angled to grip the nail head. You place it against the wood. You pull back. The curve of the claw slides under the head. You lift. The nail comes out. Clean.
If you rely on pliers, you might bend the nail. You might mar the wood surface. The claw hammer protects the surrounding material while it works. It is precise. It is reliable. It costs ten bucks at any hardware store. You will never run out of power.
When to Use Other Hammers
Not every job calls for a claw hammer. If you are demoing a wall, you need mass. A sledgehammer has the weight to break through drywall and plaster. It is a blunt instrument. Use it with caution. Wear safety glasses. Debris flies.
If you are assembling furniture or installing trim, you need control. A rubber mallet delivers force without denting the wood. It is essential for joining pieces without leaving a mark. For metalworking, a ball-peen hammer shapes metal. It is a specialized tool for a specialized trade.
But for hanging shelves? For building a deck? For fixing a loose board? The claw hammer is the default. It is the Swiss Army knife of impact tools.
The Nail Gun Debate
Nail guns are fast. They save time on large projects. But they have limits. They require an air compressor or a heavy battery pack. They jam. They go silent when you need them most. And they cannot remove what they have driven.
A homeowner might buy a nail gun for a single big project. Then store it. They will still need a hammer for the small jobs. The trim work. The repair. The thing that breaks.
Safety and Technique
How you hold the hammer matters. Grip the end of the handle. Not the middle. Leverage comes from the full length of the arm. Swing from the elbow, not the wrist. Let the weight of the head do the work. You do not need to muscle the nail in.
When removing nails, place the claw low on the nail head. Pry up slowly. If the wood is old, it might split. Be gentle. Use a block of scrap wood under the hammer if the surface is delicate.
The claw hammer is not just a tool. It is a habit. It is the first thing you reach for. It is the last thing you put away. In a world of smart homes and automated systems, sometimes you just need a piece of steel and some muscle. It works every time.
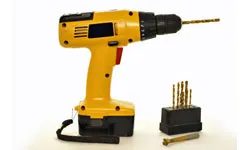
You don’t need a separate tool for every job. That’s the first thing you learn when you start swinging a hammer or twisting a screw. The power drill is the workhorse of the workshop, but most homeowners treat it like it’s only for making holes. That’s a mistake.
Most modern drills have a clutch. It’s that adjustable ring near the chuck with numbers on it. You think it’s just for decoration? Think again.
The clutch disengages the motor when the torque reaches a set limit.
This feature turns your drill into a power screwdriver. Without it, you’ll strip screw heads or drive them too deep into soft wood. You’ll ruin the material. You’ll waste hours fixing it.
How the Clutch Actually Works
When you set the clutch to a low number, say 3 or 4, the drill stops spinning once it hits that resistance. This is perfect for assembling furniture or hanging shelves. You’re not trying to bore through brick. You’re trying to secure a bracket without destroying the drywall behind it.
Turn the ring up higher. The drill will keep spinning until the bit gives way. Or until the motor burns out. Or until you crack the screw. Use high torque settings only when you need brute force. Driving large lag bolts into hardwood? That’s high torque. Hanging a picture frame? Low torque.
Choosing the Right Bits
Your drill chuck holds the bit. But the bit itself determines what you’re doing. A twist bit makes holes. A screw driver bit drives screws.
Stop using the drill for screws if you’re still using a standard twist bit. It won’t fit. The chuck is designed to grip round shanks. Screwdriver bits have a specific profile.
Hex Shank Bits
These are the most common for power drivers. They fit into a hex chuck or an adapter. They’re secure. They don’t slip as easily as square-drive bits. If you buy a set, look for hex.
PH2 Bits
This is the standard Phillips head size. If you buy a generic screwdriver bit set, PH2 is the one you’ll use 90% of the time. The other numbers (PH1, PH3) are for smaller or larger screws. But PH2? That’s the goldilocks zone.
Safety and Technique
Grip the drill firmly. Two hands are better than one. Left hand on the handle, right hand stabilizing the back or the front if it’s a pistol grip. Don’t just hold it like a pistol. That’s for movies. You’re building something.
Keep the bit perpendicular to the surface. If you angle it, you’ll walk. The screw will drift. You’ll have a crooked shelf. Or a crooked cabinet door. Fixing a crooked screw is harder than driving it straight the first time.
Apply steady pressure. Let the tool do the work. Don’t lean your body weight into it. You don’t need to push. You need to guide. If the drill bogs down, back it out. Check for debris. Then go again.
When to Swap the Chuck
Some drills come with keyed chucks. They require a key to tighten. Others are keyless. You tighten them by hand.
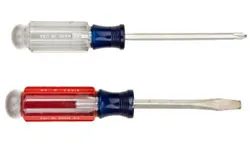
Think about it. You’re holding a tiny piece of metal, twisting it into wood, and suddenly two separate boards are locked together. It’s not magic. It’s physics. Specifically, the screw is one of the six basic types of simple machines.
If you break it down, a screw is just an inclined plane wrapped around a cylindrical shaft. That inclined plane is the thread. When you apply torque by turning the screw, those threads convert that rotational force into forward or backward motion. You can lift a heavy load with it. Or you can fasten two objects together.
Why Screws Beat Nails in Most DIY Projects
There is a reason builders swear by screws over nails. It comes down to holding power. Screws are generally better at keeping objects together because of that threading action. They bite into the material. Nails just sit there, relying on friction.
Removal is another factor. Try pulling a nail out of hardwood. You’ll likely split the wood or ruin your pry bar. A screw? You just reverse the rotation. Much cleaner. Much easier.
Choosing the Right Screwdriver for the Job
You can’t just pick any tool. The screw drives the choice of the driver. There are many different kinds of screws and screwdrivers out there. But you only really need to know the two most common types.
First, there’s the flathead. It resembles a chisel. The tip is flat. It fits into a screw that has a single slot in the head. Simple. Effective. Old school.
Then there’s the Philips head. The tip looks like a plus sign (+). This design allows for more torque before the driver slips out of the head. Many builders prefer Philips head screws to slotted ones for this exact reason. It’s less frustrating. Less cam-out.
Power vs. Manual: Which Do You Need?
Using a manual screwdriver often takes a lot of time and effort. Your wrist hurts. Your forearm burns. If you’re driving ten screws into a deck frame, you’re going to regret it.
Several tool manufacturers offer electric screwdrivers. These are great for smaller tasks. But most power drills have special bits designed to fit screws. If you already own a drill, you probably don’t need a dedicated electric screwdriver. Just switch the bit.
Either way, no toolbox is complete without at least one screwdriver.
It’s the backbone of almost every assembly. From IKEA furniture to building a shed. You need the right driver for the right screw. Flathead. Philips. Torx. Hex. Don’t guess. Measure. Match.
2: Saw
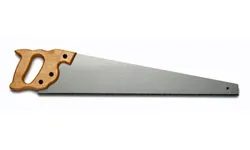
You are going to need a saw. It is a statistical certainty in any major renovation. You could spend weeks hunting for pre-cut lumber, but finding boards that match your exact angle and length requirements is practically impossible. That is the whole point of owning good cutting tools.
Power saws dominate the job site. You will see table saws and jigsaws everywhere. The problem is simple. They do not fit in a toolbox. A table saw needs a dedicated, immovable station. It is not going anywhere.
Circular saws offer actual portability. You might not toss one into a small kit, but you can carry it. The real value lies in the blades. Swap the blade and you cut wood, metal, or plastic. It is the same tool. Just different teeth.
If you prefer manual control, handsaws fill the gaps. Hacksaws handle metal. Miter saws make precise angles. Crosscut saws slice across the grain. Coping and keyhole saws tackle tight, awkward spaces.
Level and Tape Measure
You cannot measure twice if you do not have a tape measure. It sounds basic until you are standing on a ladder trying to guess a distance. Accuracy matters here. A bad measurement ruins a cabinet fit or leaves a gap that plaster cannot hide.
Levels are equally non-negotiable. A bubble level tells you if your shelf is crooked. A laser level throws a straight line across an entire room. Neither works if you skip them.
- Tape Measure : Get one with a clear tape and a sturdy hook. 25 feet is standard. 16 feet might cut it short in a big room.
- Spirit Level : 2-foot or 4-foot models. The vials need to be bubble-steady.
- Laser Level : Optional but helpful for long runs. It saves time on layout.
Skip the cheap plastic ones. They warp. They break. You will buy a better one anyway.
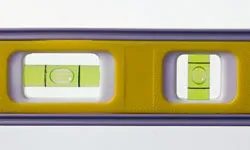
You’ve heard it a million times. Measure twice, cut once.
It’s a cliché for a reason. Skipping this step doesn’t just waste wood. It wastes your sanity. When you’re standing in a half-finished kitchen with a cabinet that won’t fit, frustration sets in fast. That is why your level and tape measure are non-negotiable. Use them right. Save the tears.
How to Use a Spirit Level Correctly
A level isn’t just a stick. It’s a truth-teller. It tells you if a surface is flat or if a wall is straight up and down.
The classic tool is the bubble level. It contains vials filled with colored liquid. An air bubble floats inside. Look at the lines on the glass. If the bubble sits exactly between the marks, your surface is level. If it leans left, your shelf will slide everything off. If it leans right, your door will hang crooked.
There is a newer option. Laser levels. They shoot a beam of light to show horizontal and vertical lines. They are faster. They are high-tech. But they cost more. For most DIYers, a standard spirit level does the job without breaking the bank.
Which Tape Measure Should You Buy?
Tape measures are essential. You need them.
Do you need one or two? It depends. Some homeowners keep two tapes. One for inches. One for centimeters. It removes the mental math. It stops the squinting at tiny metric markings when you are working in an imperial world.
Or you can buy a laser distance meter. These devices shoot a beam and give you a digital readout. Some models switch between imperial and metric automatically. They are accurate. They are fast. But they rely on batteries. And they can be pricey.
Without a good measuring tool, your construction project relies on blind luck. Do you want to rely on luck? Probably not.
Why Accuracy Matters More Than Speed
Cutting wood before measuring is a rookie mistake. It happens to the best of us. We rush. We assume. We get it wrong.
Then we have to scrap the piece. We lose material. We lose time. We lose patience.
Precision prevents this. It keeps your project on track. It ensures your shelves fit. It ensures your tiles align. It ensures your doors close.
The Bottom Line on Essential Tools
This wraps up the essential tools every builder needs.
These basics—levels, tapes, squares—form the foundation of any good renovation. They are cheap. They are durable. They are vital for success.
If you want to go deeper, check out the related articles on concrete roofs or how ceramic tile is made. There is a lot to learn.
“Simple Machines” remain the backbone of DIY success. Master them first.
Start with the basics. Measure carefully. Cut slowly. You’ll finish your project faster than you think. And the result will look professional.