You don’t need to tear up rotted, scratched, or ugly wood flooring to save a room. If the subfloor is reasonably level, a fresh coat of paint can redeem even the worst timber. The effort is minimal. The results are surprisingly high-end.
This isn’t just a quick fix. It’s a total transformation that requires patience, precise planning, and the right materials. You’re essentially turning wood into a canvas. Here is how to do it right without ruining your investment.
Зміст
Planning the Design Before You Buy Paint
Most people skip the planning phase. Don’t. Measure your room. Then, map it out on graph paper. Include every door, window, and permanent obstruction. This is your blueprint.
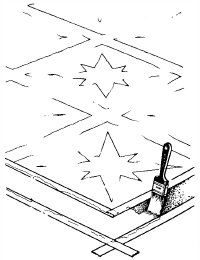
The easiest design is a solid color. But if you want stripes, checkerboards, crossword puzzles, or faux-fool-the-eye tile patterns, you need a sketch. Borders on a plain ground work well. Supergraphics or Art Nouveau borders add flair. The only limit is your time. Oil-base interior gloss or semigloss enamel is non-negotiable here. It holds up better than latex in high-traffic zones.
Buy paint only after you finalize the pattern. Buy only what you need. If your design is complex, you’ll need multiple brushes—one for each color. Don’t reuse a brush between colors. It will bleed. Also, calculate how much polyurethane varnish you need. You’ll apply three coats. Read the label for coverage rates. Prefer a gloss finish for durability.
Preparing the Surface: The Most Critical Step
If you skip prep, the paint peels. Period.
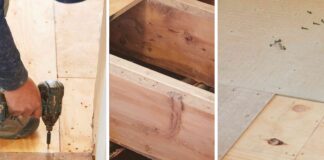
Start by removing furniture and floor registers. Use a screwdriver or hammer to take up registers carefully. Wash the floor thoroughly. Use a strong household cleaner solution. Scrub with a brush to remove old wax and grime. Scrape off existing paint or putty spots with a putty knife while you wash.
Rinse completely. Soap residue prevents adhesion. Wipe dry with clean rags. Let it sit until bone dry.
Next, fix the imperfections. Drive protruding nailheads into the wood using a nail set and hammer. Sand rough spots with fine-grit sandpaper. Fill cracks and holes with plastic wood. Smooth it in with a putty knife. Let the patches cure fully.
Now, scour the entire floor. Rent a floor polisher loaded with steel wool pads if you can. If not, scour edges and boards by hand using grade 000 steel wool. This creates a mechanical bond for the new paint.
Vacuum everything. Dust is the enemy. Close doors and windows to keep air stagnant and dust-free. Wipe the floor one last time with a tack cloth. It should feel smooth and sterile.
Transferring the Pattern to the Floor
Put on clean, soft socks. You don’t want to track dirt onto your prepped surface.
Use a soft pencil to mark light outlines. Measure carefully from the walls. Snap chalk lines to mark long edges. For complex designs, draw a grid on the floor that matches your graph paper diagram. Transfer the pattern square by square. You can correct minor mistakes freehand once the grid is up.
For simple repeating patterns, make stencils out of light cardboard. Cut them with single-edge razor blades. Trace the stencil design lightly onto the wood. This keeps lines straight and consistent.
Painting the Floor
Patience is key. Paint one color at a time or one section at a time. Complexity dictates your strategy.
If you’re adding a pattern over a solid background, paint the background first. Let it dry completely. At least 24 hours. Do not rush this.
Use masking tape to separate large areas of color. Define stripes and borders with tape. Paint large areas first. Let them dry. Then tackle small patterns and detailed edgings. Let each color dry before applying another adjacent color. This prevents bleeding.
Wear clean socks while painting. Leave the door closed to keep dust out. Once the entire design is down, let the floor dry for another 24 hours.
Sealing with Polyurethane
Paint is pretty. Polyurethane is armor.
Seal the newly painted floor with three coats of polyurethane varnish. Put on clean socks. Wipe the floor lightly with a clean tack cloth before starting.
Apply varnish along the grain of the floorboards. Brush slowly. Fast strokes create air bubbles. Let it dry for 12 hours. Apply the second coat. Brush slowly along the grain again. Let it dry for another 12 hours. Apply the third coat. Let it dry for at least 24 hours.
Replace floor registers.
Wait. Do not move furniture in yet. Let the floor dry for two or three days. Polyurethane hardens with time, not just air exposure. Rush this, and you’ll have scuff marks on day one.
Now that your floors are transformed, consider adding a mural to the walls. It’s the next logical step in a full room overhaul.